A guide to making plastic-free winter decorations.
Hello adults! Firstly, a huge thank you for being among the first New Fielders! We’re right at the start of our journey and we hugely value your faith in our little world of adventuring/magic/science/making. This is a step by step guide for making a completely plastic-free bauble or decoration from pine cones or pine needles. Please use this in conjunction with your ANF kit.
Nearly.
ANF kits are fun for all the family. They contain loads of exciting equipment for adventuring, documenting, foraging, mixing and making awesome, plastic-free products. But every kit is missing one key ingredient – and you need to follow the guide to go forage for it!
The product you will be making is entirely natural - it will contain no artificial ingredients, drying agents, solvents or plastics.
Before we start, please remember this is a craft product and so results may vary — we have included enough ingredients for two attempts or to try two different methods.
Everything you need
In your kit, you should have:
A simple kids foraging guide
Agar agar, 20g
Calcium Propionate, 6g
Sugar, 30g
Glycerol, 5g
Bauble mould, 2 parts
Bauble hanging piece
Cotton piping bag and heads
Pot of paint
Miswak stick
Glass beaker
You can scroll to the bottom of this guide for more information on each item.
First — The Kit
Things not included that you will also need:
Oven, for drying the foraged materials
Pestle and mortar / blender or even tea towel and rolling pin for grinding up the foraged materials
Kitchen sieve (optional), for making the material as fine as possible.
Some tape, for holding the mould together
A weighing scale, for weighing out the right quantities
A hob and a pan, for mixing the material (don’t worry, it washes off and doesn’t stick)
Somewhere warm and dry, to let the bauble dry
Let’s Forage Outdoors!
You need to find pine cones or pine needles. Ideally you’ll use one or the other for this process, but if this isn’t possible then a combination of the two will still work.
You will need about enough to have filled half the box your kit came in, but it’s better to have too much than not enough. If it’s wet outside, use a tupperware or similar.
If you celebrate Christmas, the needles from a christmas tree will work for this purpose, but we recommend making an adventure out of it and letting the child lead the hunt.
September to December is pinecone season, so assuming you’re doing this in these months you should be able to find some fallen around the base of conifer trees in your local park or woodland. If you’re doing it outside of these months, you might have more luck hunting for pine needles.
Stage One: Explore
Outcome of stage: To have collected enough foraged materials.
Feeling of stage: “I am an adventurer, on a mission to explore for secrets”
Rough timings: 30 minutes to a whole day depending on your preference
First, drying
Bring the materials home. Wash the foraged materials in warm, soapy water then rinse them in cold water. Let them dry.
Preheat your oven to 70 degrees celcius. Lay your foraged needles / cones out on a baking tray on baking paper or tin foil, and put them into the oven until they have completely dried out.
Don’t rush this step with a higher temperature or you will cook or set fire to your ingredients.
Make sure to let them cool before continuing.
Stage 2: Magic
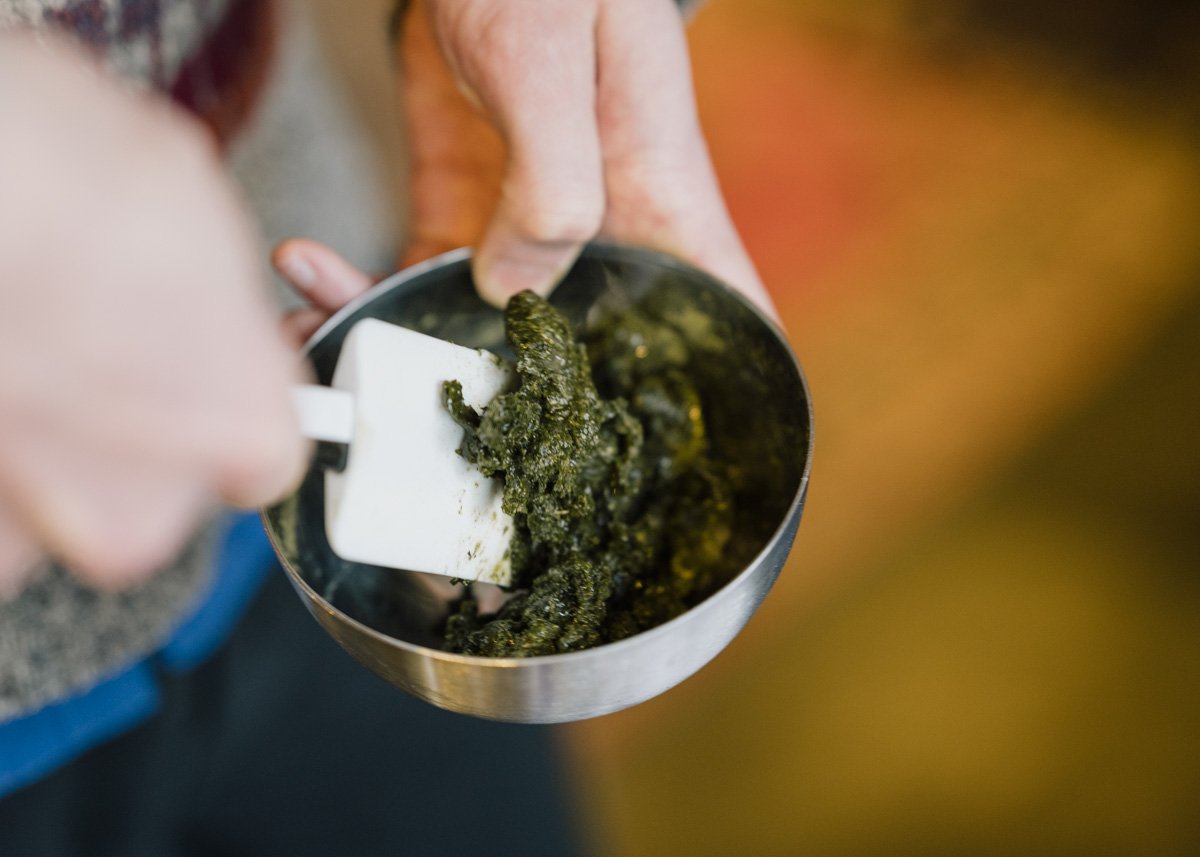
Next, grinding
Using a pestle and mortar or a blender, grind up your ingredients into as fine a powder as you can. The finer the powder, the easier the foraged materials will mix with the rest of the ingredients and the more likely your bauble will succeed.
If you’ve foraged for pinecones, you could smash them with a rolling pin by first placing them under a tea-towel. Please be careful if you let a child do this.
Ideally you’re aiming for a sand-like consistency. Using a kitchen sieve can help you get to a perfect consistency and remove the bigger chunks.
Outcome of stage: Have prepared the foraged materials ready to be mixed with the other ingredients.
Feeling of stage: “I am a wizard, preparing the ingredients for my magical potion”
Rough timings: Drying — 10 minutes prep, 1-2 hours oven drying. Grinding — 10 minutes +
An important note
⚠️ Please read all the instructions before beginning these steps. There are two approaches to making, one using the mould included and the other, freestyle using the piping bag. Both approaches involve the same ‘mix’ so you’ll need to follow the ‘let’s cook’ steps whichever approach you take.
⚠️ Whilst all the materials in our kit are edible, it’s best not to eat them. After handling any materials, ensure hands are properly washed with soap and water.
Prepare
Prepare the quantities of your materials using a kitchen scale. You’ll need 15g of ground pinecone or needle / 15g of sugar / 7.5g of agar agar / 3g of calcium propionate / 1g of glycerol / 250ml of water
a. Using the mould — Take both halves of your mould and tape them securely together with masking tape or similar. There should be no gaps.
b. Freestyle with piping bag — Unfold your piping bag and choose a nozzle - you can always change these during the process. Find a flat surface like a baking tray lined with baking paper on which to pipe your creations. Alternatively, use each half of the mould to pipe onto - creating semi-spherical shapes you can later stick together.
Let’s Cook!
First, in a pan, mix your sugar and agar agar with 150ml of water. Leave this for 5 minutes to hydrate.
In your beaker, mix 100ml of water with your foraged material and your calcium propionate. Mix well.
Put the pan on a medium/high heat and stir constantly. When the mixture begins to bubble, add the glycerol. When the mixture boils, add the solution of foraged material from the beaker. Keep stirring and allow to boil again.
Once the mixture has boiled again, allow it to bubble for a few minutes, then take it off the heat and allow it to cool slightly. Stir regularly.
⚠️ If the mixture cools to room temperature, it will set. You will need to complete the next steps before this happens.Carefully pour some of the mixture into the beaker and stir well. You can use your miswak stirring stick for this, but make sure you wash it afterwards as you’re going to need it for something special later on!
⚠️ You should have already chosen your preferred method of making — mould or piping bag. For the mould, use the instructions in Approach 1 below. For the piping bag, skip Approach 1 and head straight to Approach 2.
Approach 1: Using the mould
Using the lip of the beaker, pour half the beaker into your spherical mould.
As soon as you have done so, cover the hole with your thumb and begin to rotate the mould in all directions, coating the walls with the material. Don’t burn yourself, if it’s too hot then wait for it to cool more.
If more liquid is needed, pour in more from the beaker.
As the liquid cools, it will set. Keep rotating the sphere until this happens to ensure even coverage across the mould. This may take anywhere from 5 to 20 minutes.
As you do so, hold the mould up to the light — you will be able to see the liquid moving inside and you’ll know it’s finished once the liquid has cooled and hardened.
Any remaining liquid in the pan might be poured into other moulds you have around the house, like a jelly mould.
This will now need to set for at least 48 hours (depending on where it’s being kept, it might need more or less time) — whilst it does so, place the mould with the hole facing skywards in the ANF box, using the cardboard insert, but make sure to leave the box open. Place the box somewhere warm and dry. If it’s placed somewhere damp then there’s a risk the bauble will develop mould. If it’s placed somewhere cold, it will not dry.
⚠️ It is very important to resist the urge to touch your creations until they are completely dry. This will pass on the bacteria on your hands to the mix and encourage mould.After 48 hours, very carefully remove the tape from the mould. Even more carefully, remove the top half of the mould, being sure not to tear the skin of the still delicate bauble. Leave this to dry for a further 24 hours (depending on where it’s being kept, it might need more or less time).
After 24 hours, very carefully remove the bauble from the mould, again being careful not to damage it, and rotate it 180 degrees. Loosely pop it back in the mould and allow it to dry for another 24 hours (depending on where it’s being kept, it might need more or less time).
You will know the bauble is ready when it is no longer cool to the touch (as your bauble dries it will feel cooler than room temperature, like it’s been in the fridge). This might take up to a week. During this time it will shrink as the water evaporates.
Approach 2: Using the piping bag
Once your mixture has reached the consistency of cake batter (loose but not runny), pour it quickly into the piping bag (you have already chosen and added a nozzle to your bag.
Squeeze the mix to the bottom of the piping bag and begin carefully piping your mix into your desired shapes. This is a very similar process to icing a cake, and offers the same level of creative experimentation. You could make snowflakes, flowers or just big blobs to hang from the tree.
⚠️ If the mixture is not holding its shape after piping, allow to cool for a little longer until the mixture is thicker.
To ensure the piping bag is reusable, wash it thoroughly as soon as you have finished using it.
⚠️ It is very important to resist the urge to touch your creations until they are completely dry. This will pass on the bacteria on your hands to the mix and encourage mould.This will now need to set for at least 48 hours (depending on where it’s being kept, it might need more or less time) — whilst it does so, place the tray somewhere warm and dry. If it’s placed somewhere damp then there’s a risk the bauble will develop mould. If it’s placed somewhere cold, it will not dry.
You will know your creation is ready when it is no longer cool to the touch. This might take up to a week. During this time it will shrink as the water evaporates.
Stage 3: Create
Outcome of stage: Have mixed the ingredients correctly and set them in a mould.
Feeling of stage: “I am a scientist, experimenting with new and exciting materials”
Rough timings: 30 mins — 2 hours depending on levels of enthusiam!
Time to paint
Once your decoration is dry, you can use the VOC free paint in the box, or any you have at home to personalise your decoration.
Take your [clean] miswak stick and chew the end of it. As you do so, you’ll feel it becoming fibrous in your mouth. Once chewed, your miswak stick is now a miswak paintbrush!
Use your miswak paintbrush to paint your decorations. If you want to refresh the brush you can cut off the end and re-chew it!
⚠️ Try not to use very watery paint, as your natural decoration will dissolve over time in water.When the paint is dry, attach the hook included in your kit so the bauble can be hung. You may need to make an appropriate hole in the bauble with scissors or a pin in order to attach the hook.
Stage 4: Decorate!
Outcome of stage: Have a decoration that takes pride of place in your festive display!
Feeling of stage: “I made something, and I want to again!”
Rough timings: However long you like
#ANFwinter
Share your creations on instagram using the hashtag #ANFwinter. We’ll pick our favourite and send the winner our next kit, free!
Hot Tip: You can use the box as a display plinth.
Stage 5: Share!
Outcome of stage: “My friends can see my creation.”
Feeling of stage: “Proud”
Rough timings: Pretty quick!
Your Kit:
What have you got?
There are some things in your kit you may not have come across before. There are others that we’d like to tell you a bit more about too. Everything in your ANF kit has been carefully sourced and selected to ensure minimal environmental impact. The product you’re making is entirely natural:
Agar agar — This jellylike substance is a mix of carbohydrates that have been extracted from red algae, a type of seaweed. It comes in powder form and becomes gelatinous when mixed with liquid. It is used as a thickening agent and it what will help your creation take form. It is a vegetarian alternative to gelatin. It is often used in cooking.
Calcium Propionate — Calcium propionate is a natural salt that is often used in bakery products as a mold inhibitor. It interferes with the growth and reproduction of microorganisms, and is useful in ANF products as it reduces the chances of your creations going mouldy.
Glycerol — Glycerol is a naturally occurring alcohol. It is often referred to as Glycerine in the UK. It can be extracted from soybeans.
Bauble Mould and Pots — Your bauble mould and the pots that your ingredients came in are made from a plant-based PLA. This is a form of bioplastic that is fully biodegradable and is made from plant sugars. It can be made from any sugar, such as corn starch, cassava, sugar cane, or sugar beet.
Pot of paint — You have two pots of paint powder. They are special earth-based paints. Made from real earth, [as in soil] mixed with tiny amounts of natural mineral pigment. They are VOC and solvent free, and one of very few genuinely non-toxic paints available.
Miswak stick — Miswak sticks [from the miswak tree] have been used as a magic toothbrush-toothpaste for millennia. The miswak, along with other forms of chewing sticks, is considered to be the first documented form of dental hygiene. It is still commonly used in the Middle East, North Africa, and Central and Southeast Asia and is arguably the best-kept secret of the ancient world. It literally is a natural toothbrush that grows on trees! Once you’re done using yours as a paintbrush, why not keep it to brush your teeth with too?
We hope you found this interesting! If you’ve got any questions please get in touch!